Reuse a Washing Machine Motor, Make an upcycled multi-tool!
The last three videos have all been about using old washing machine parts! Two have shown the de-construction and upcycling of the bearings and frame, into something I could use as a multi purpose rotary machine, and the latest one, is all about the options faced by the maker who wants to control a motor taken from an old washing machine.
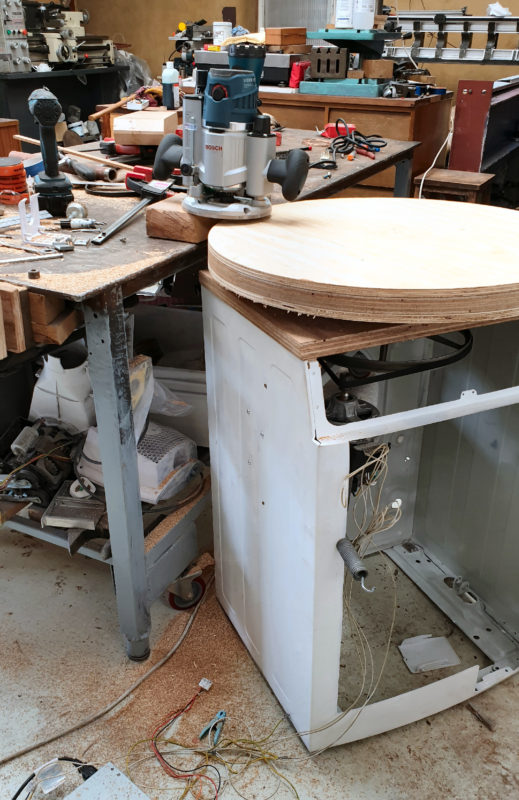

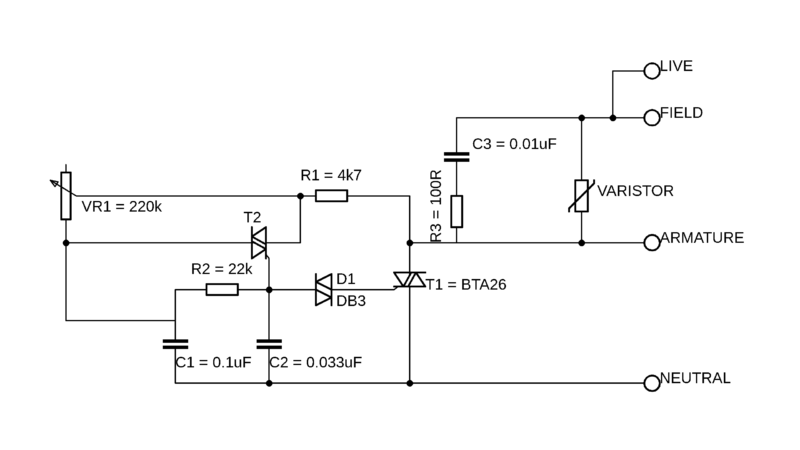
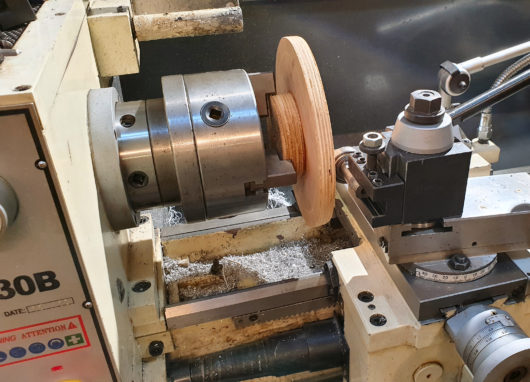
Ages ago I made this wood lathe which was driven by one of the ubiquitous brushed universal washing machine motors. I used a simple triac based control circuit. This is a circuit that has a nice low part count and is very easy to construct using a single piece of perfboard. What I like about this controller is it’s simplicity, and versatility – you can use it, in combination with washing machine motors on all kinds of tools, from belt sanders to pillar drills.
What I never really liked about it was its low speed performance and particularly the way the motor slows down when you make it work – it that case when you start digging your cutting tool into the bit of wood being turned on the lathe. The third circuit I describe in the video addresses this to some extent by adding in a transformer that supplies the motor’s field winding with a low voltage and high current rectified source – effectively making it behave more like permanent magnet brushed motor.
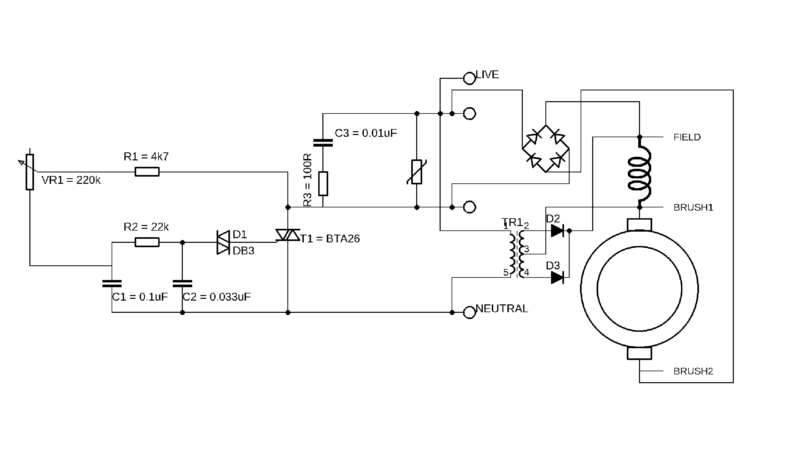
The third circuit discussed in the motor control video.
That system works well and is simple enough, but I had to go one step further and try my hand at making a ‘closed loop’ control circuit that used an Arduino micro-controller to drive the motor at very precise and measurable speeds. This is the final circuit I spend the second half of the video talking about..
The video is a great overview, and I recommend any budding makers/ tinkerers that want to control washing machine motors start by watching and understanding most of that video. But to go with it I wrote a reasonably comprehensive instruictable, that has all the part lists and circuit diagrams one could need…
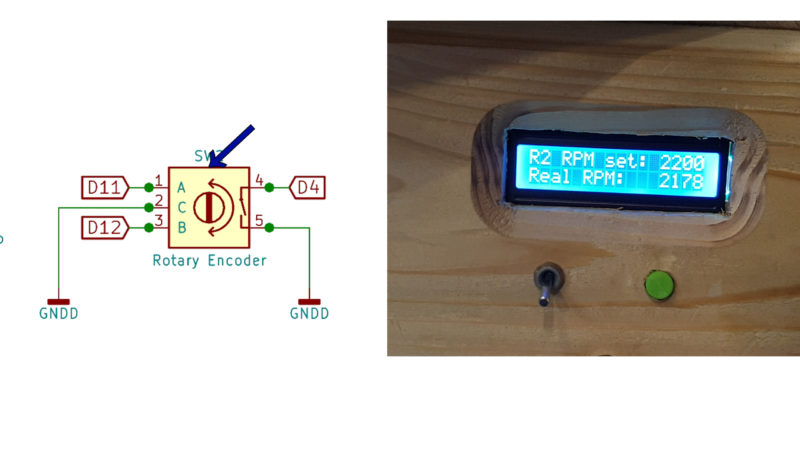
Because the machine this motor and controller is destined for is a multi purpose thing (primarily for green sand mulling), the speed control wants to be quite tight over a range of relativly low RPM. This is where closed loop feedback promised to be really handy. One thing I learned though, through trial and error (lots of error): these washing machine motors don’t love running way below their ‘max torque RPM’, which is about 8,000. If you were making a lathe, for the sake of peace and sanity you could limit this to about 4,000 RPM without too much problem.
Difficulties start when you go lower than 1k rpm… The power just isn’t there – or I still need to fiddle more with my PID tuning in the Arduino code – I’m not 100% sure which. Either way, I think to get the most out of these motors you will certainly want a reduction pulley or gearing to get a useful speed for most workshop tools.
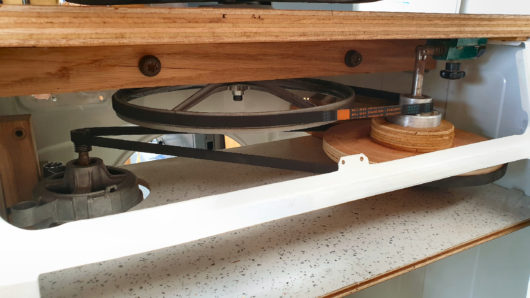
The good news is that at these speeds and forces, a plywood pulley in conjunction with the poly-V belts (that are regularly used on the washing machines themselves), is sufficient to transmit drive from these motors. In my case, for the multi machine, I want very slow RPM at the platter, so I am using a two stage reduction, that makes use of the intermediate plywood pulley shown above. and the original washing machine’s alloy drive pulley. It gives me a total speed reduction for 73:1. So when the motor is running at a reasonable 1200rpm I’m seeing the platter turning about 16rpm or make a full rotation approximately once every 3 seconds – which is about right for what I want…
I’d love to hear from you if you have built something that uses a washing machine motor. How are you controlling and powering it?
June 10th, 2019 at 12:58 am
U are way above my capacity to know what I’m doing with washing machine motors. Most motors I have obtained have been cut out of the frame with maybe(sometimes) a couple wires hanging out. How in the world am I going to even begin with something like that. I’m not electronically astute so that leaves me totally dependent on those who know more. There are several things I would like to make using one of these motors like a 12” sanding disk. But again I have to start by figuring out the wiring & what goes where. I might try to enlist your help if I ever get the nerve to start. I like your post & web site. Thanks
Claude
June 11th, 2019 at 7:09 pm
Hi Claude, Thanks for the comment. Have you had a good look at the youtube video I made? There is a table there about 1 min in, that can help you figure out which wires are which. Any specific questions and I will help if I can :)
November 10th, 2020 at 2:35 pm
Thanks for the post is educative and I will like to use Arduino Uno to control the speed of treadmill motor using opto coupler and tacho meter sensor for constant speed.
Can I download the same sketch program using only Arduino Uno?
November 11th, 2020 at 12:28 pm
Emmanuel. I see no reason why not…