Cyclone build part 1 – The Cone
After I ruled out oven forming (hehe that was a funny experiment), I moved on to cold-bending, which is quite possible with polycarbonate. Polycarbonate, also known as Lexan, is the tough stuff they make bullet proof glass, machine tool safety guards and goggles from. It has glass-like transparency, is super strong and has quite good cold shaping characteristics: the rule of thumb seems to be that you can bend a circle of radius 100 x the sheet thickness. Thus, if we have a sheet of polycarb that is 0.75mm thick the smallest tube we could make by wrapping it up, will be one of radius 75mm.
So for the DS we are going to bend this rule a bit, because we want the diameter of the bottom of the cone to be close to 70mm. The very bottom of the cone (the ‘dust chute’), which becomes more cylindrical than conical, is more like 51mm. But we can use the lower half of a standard polycarb half pint glass to form this ‘dust chute’.
For the cone, begin with a nice big sheet of 0.75mm polycarbonate (wants to be about 780mm * 780mm). This thickness is ideal as it wraps up tightly enough to form our cone and is thin enough to be cut with tin-snips or very good scissors. You might think that this is quite thin for such a rugged application, but we can wrap it, so that it overlaps several times, making the finished thickness more like 2.25mm, which, with the mounting supports and the one-piece dust chute is more than enough. Hover over the photos for more…
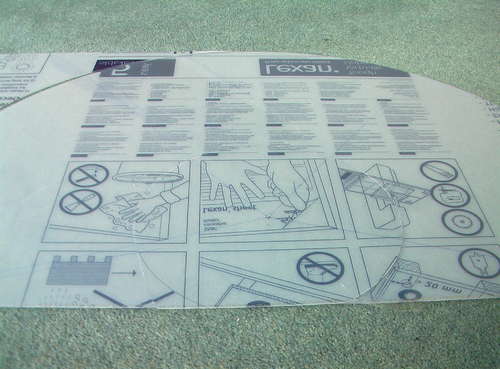
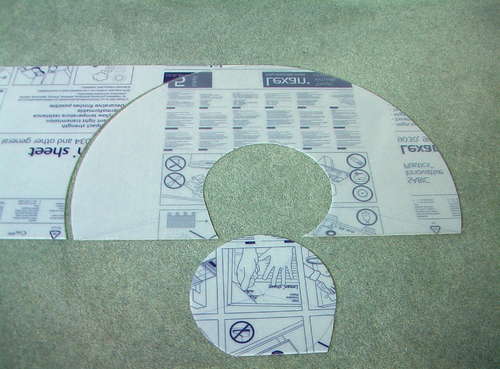
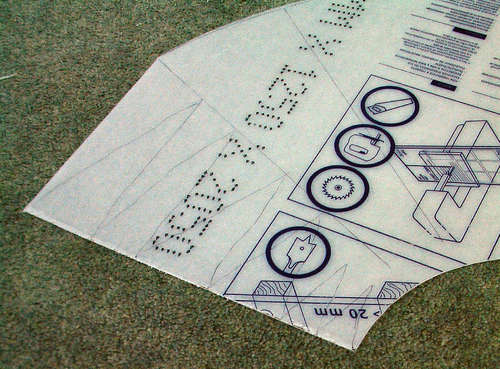
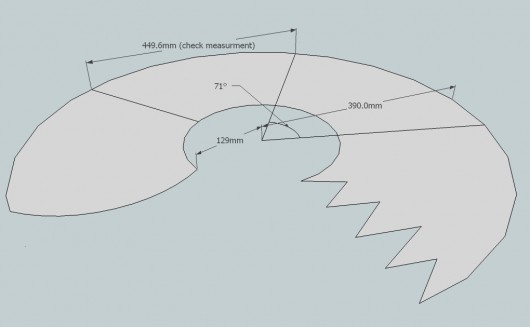
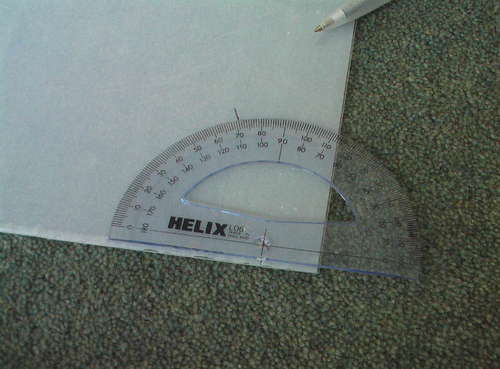
Each 71 degrees of the flat arc represents one full loop of our cone when the material is wrapped up. With the first experimental cone I made, I measured and marked out for one loop with a small overlap (thinking that I could then make another separate cone to go inside). Don’t do it like this – you want the cone to simply overlap on itself a few times without the faff of joining several individual cones and stacking them inside each other. So to do this we need to mark out a very big arch – more than a semicircle’s worth.
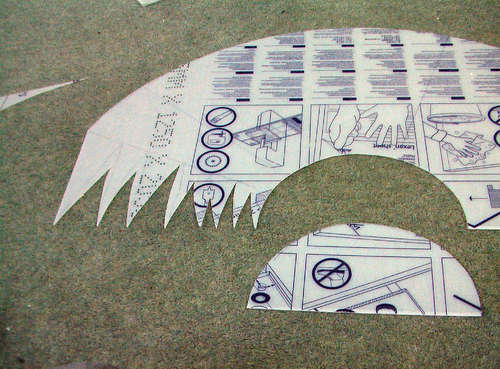
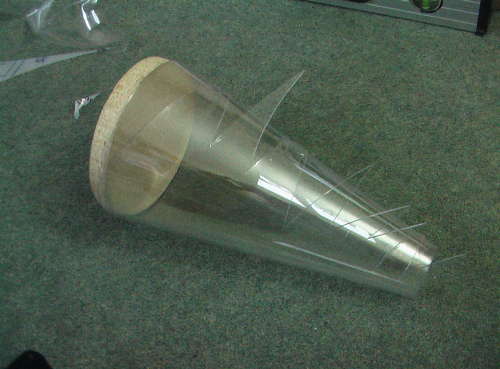
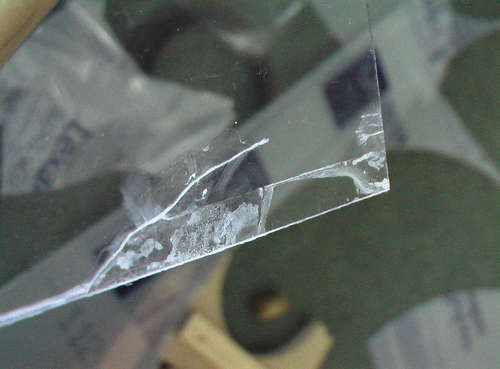
For the outside seam, you can glue it in stages – undo a bit of masking tape near the top, pull back the polycarb making a flap and inject some glue under it, hold together till set, then move on to another bit, etc. When you are done and the cone shape is secure, you can run one continuous bead along the outside seam, to ensure air tightness. Of course all this would be easier if you can borrow an extra pair of hands for a few seconds to hold the cone for you while you glue it.
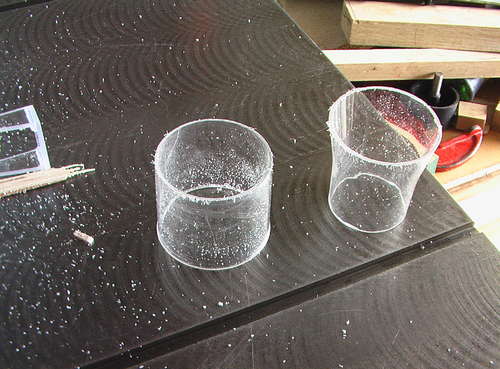
NOT LIKE THIS. This was my first experimental cone – I measured and marked out for one loop with a small overlap (thinking that I could then make another cone to go inside). Don’t do it like this – you want the cone material to simply overlap on itself a few times.
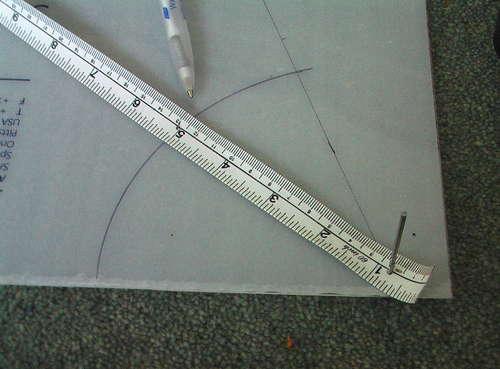
Again the wrong angle but just to show, you don’t need a huge compass for this. I used a hole punch to ‘mark’ our tape measure at the right lengths, and used that to pivot about the drill bit used to make the ‘centre point’ hole.
April 23rd, 2011 at 12:15 pm
Hi,
very interesting.
Where did you buy your polycarb from please as I would like to make this.
regards
tony
April 30th, 2011 at 11:47 pm
Hi Tony,
I forget the exact seller, but it was from e-bay (the history doesn’t go back far enough for me to find out).
Let me know how you get on with this, and feel free to ask if you have any other questions.
Bongo.
September 4th, 2012 at 12:48 pm
Hi,
I’m fascinated by your project. Very well planned and implemented. Finally I decide to make one like this myself.
I’m curious which glue did you use before hot melt glue. I start googling what is used to glue polycarbonate and same thing keep coming back: weld-on 4. I decide to check with you before I make my own mistake :)
Regards,
Kirill
September 9th, 2012 at 12:25 pm
Hi Kirill,
We tried a product called Liquid Poly first (made by ‘Humbrol’) – as I said, didn’t work as it fractured the polycarbonate. It is a vary thin consistency, the idea being you brush it along the joint, with the pieces all clamped in final position, and it is drawn into the gap by capillary action. So for this method the joints need to be very well fitting…
But yeah, that didn’t really work with thin polycarb or polycarb that was under any stress (ie. bent into shape).
Weld-on 4, looks to be similar (water-thin, solvent based), so I don’t think, but am not 100% sure, it would work well.
Hot melt is exceptionally easy to use – apply from gun, hold pieces together for 20secs or so, and your done. It might not be the strongest (in fact I’m pretty sure it isn’t) but very convenient.
I had read that you can get specialist polycarbonate hot melt sticks… That would be my starting point if I was to research this again. At some point we are going to be making another much larger cyclone for the FE workshop, so I would really appreciate it if you let me know what glues you end up considering…
October 2nd, 2012 at 10:12 pm
I am a little confused…you have your inside radius listed in your drawing as 129mm’s, however, the picture that you show (with the tape measure and drill bit) shows the line at 129 mm’s. But, the drill bit in the picture is not at ZERO…more like the 20mm mark thru the tape. This would make the inside radui actualy 109 if you moved the drill bit center point to zero…correct?
October 7th, 2012 at 11:21 am
Hi Mark. If you look at the text above that pic, it may help explains – That was one of my prototyping mistakes- I only put it up to show how a ‘large compass’ could be made, not as a guide to measurement or anything… Hope that helps clarify for you :)
January 9th, 2013 at 12:11 am
Looks great!
i’m curious about how well the poly holes up to scratches from debris. I LOVE seeing all the dust and dirt swirl around in the cyclone, but i keep reading that it isn’t very scratch resistant and i’m worried after a while it won’t be transparent :(
btw you guys rock!
January 9th, 2013 at 12:39 am
Hi Tekkon,
We love watching it swirl too, and it is even quite a useful and clear visual check that the system is running right.
The polycarb will scratch over time, no way round that I’m afraid – but ours are still quite see-through after a lot of use – just not crystal clear any more. If you were super worried I think you can get special ‘scratch resistant’ polycarb. I expect it’s more expensive though…
We are about to build another ‘big one’ for the new workshop and will spec poly again.. So yeah it might mist a bit but the inside will always roughly visible…
December 25th, 2018 at 2:19 am
Looking at this I thought there had to be a better way – are there no people out there selling standard clear plastic cones in roughly our dimensions?! After about 45 minutes of working google, I have discovered the joy of clear acetate cones for doll making!! Just about to order a stack of 6, 38cm tall and 17.5cm diameter. No idea thickness but cant be too flimsy right, and if they are I’ll just offset two and fill with low viscocity epoxy. Either way, no need for expensive polycarbonate or the ball ache of forming it into a cone. Win! Slightly steeper than the 2D2D dimensions from my research, looks pretty close to your construction above but unsure re the 1.64 dimension. Is this the cone dimension to an expected point, or to the opening, and then what is the relative size of the opening compared to major D of the cyclone main body. Maybe you did write it and I missed but hey. Anyway, pretty sure its not an exact science since have seen people researching cone dims as different as 3D1D (3D cone length, 1D body height). Saw a paper that said 2D2D was most effective, gives just under 10deg cone angle I believe, and a sketch with 1/3D as the minor D on the cone. The doll cones are about 13deg so eh, close enough!