DIY Stove Top EcoFan
Lets make a cool little stove top ecofan. A fan that uses the warmth of the wood burner to power itself, and blows that heat about the place, essentially aiding in the exchange of heat from the fire to the room. Ok so that’s the sales line anyway, I must admit to being a bit of a sceptic about just how much these things help, but we can get to that later.

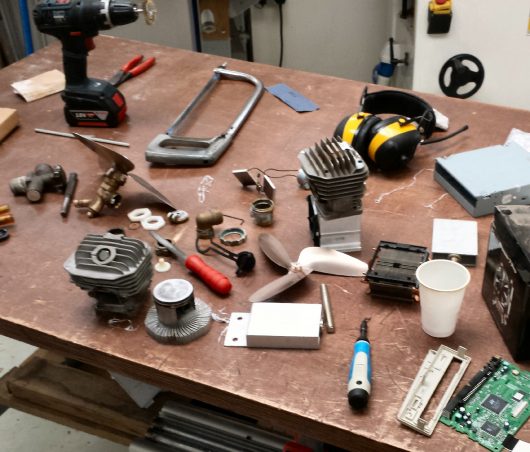
Click the above pic to watch the video and read on for more. Shown below is the way most of our projects start – with material based design. Working out what junk you have and how you can morph what you want to make to meet it half way. In this instance after rummaging through some scraps, that I had been half keeping for this project, I came up with the idea of using a seized old chainsaw cylinder as the main heatsink.
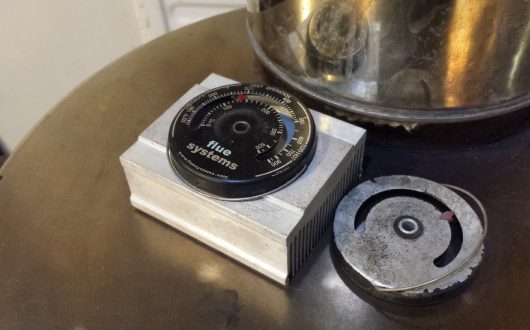
As for the base, the part that draws heat from the stove top and transfers it to the Thermoelectric generator (TEG) module (also called a ‘peltier’), I had a few different old CPU heatsinks to choose from. TEGs, especially cheap ones, don’t like too much heat (150C is a common maximum). You can measure the temperature drop using a pair of stove top thermometers, or even just one if you’re patient. If you don’t have one of these little things I recommend getting one, they are relatively cheap and are a useful tool to check you are burning wood efficiently. In the photo below you can see a drop of roughly 150C, which would put the TEG close to its tolerance when the stove is operating at normal temperatures (which for the experimental sideways burning stove is about 250 – 300C)
Another option, shown below, for a base/riser is to use an old aluminium piston. I have done that in the past and it works quite well, but for this one I am using a square CPU heatsink. This has the advantage of being easy to drill and tap holes in.
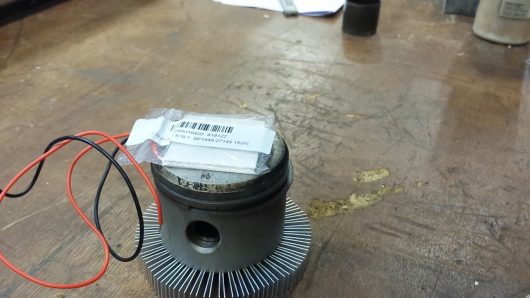
Whatever is used for the base, if you use a chainsaw cylinder for the ‘cold side’ heatsink, than you will need something to carry the heat from the TEG to the cylinder. Without this the peltier just sits inside the cylinder cavity. I am using a small flat copper scrap I has lying about.

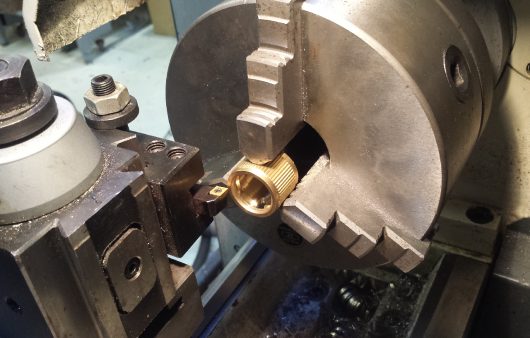
I found that an old brass compression elbow taken from central heating renovations would actually thread straight into the cylinder’s spark plug relief. This should make a cool motor mount, and the wires to the TEG can be threaded through the elbow and cylinder.
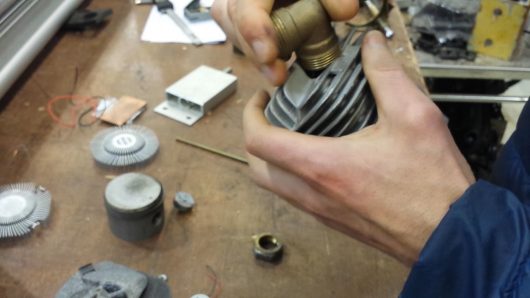
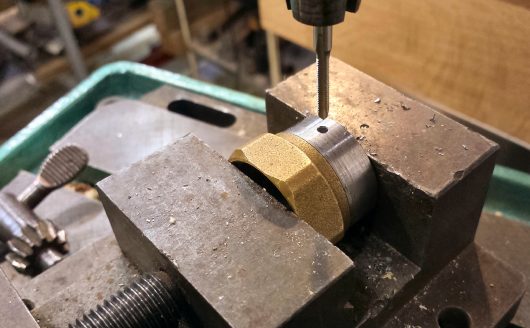
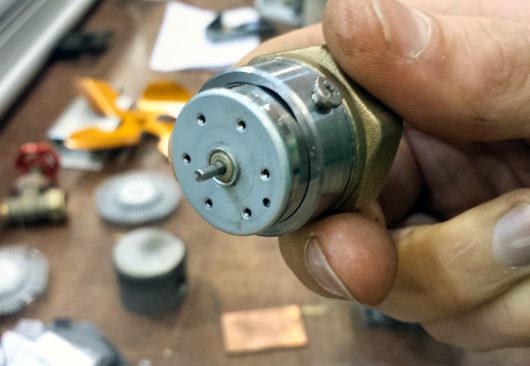
The next job was to make a mount so the motor would fit into the brass elbow. The first pic you can see below didn’t work out so well (you can watch the vid to see why). So then I turned up a scrap of mild steel pipe, and that worked well. I drilled and tapped this to accept a setscrew that holds the motor firmly in place.
The motor is just a small 3V DC motor scavenged from an old CD/DVD drive. If you dont have one, you can buy them for less than £1 on ebay.
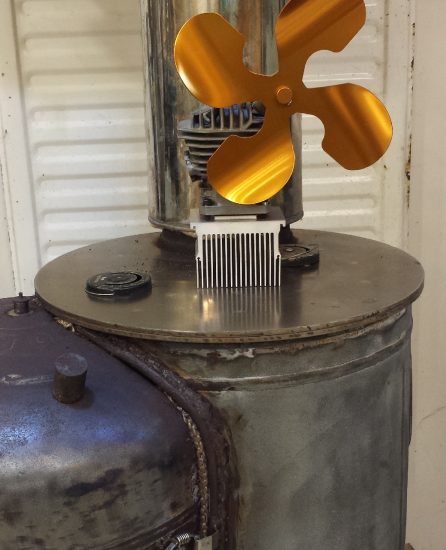
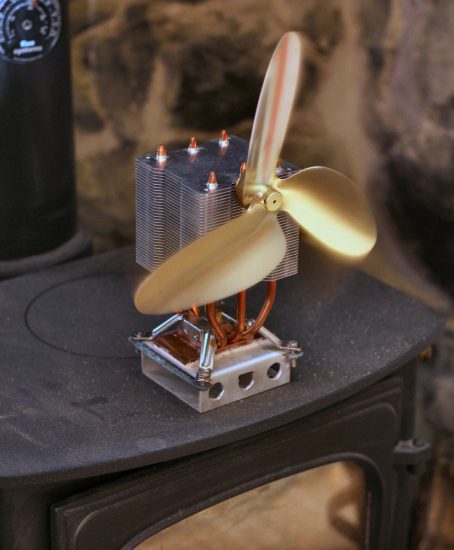
I think that’s all the main components covered. Assembly is simply a case of bolting the cold-side heatsink (the chainsaw cylinder) to the hot side base (the old CPU cooler), sandwiching the TEG between them.
It works well enough, though the 25W mains powered room fan I use to blow over the heat exchanger is about a million times more effective at getting the heat out and into the room. I guess that’s not the point though – these little fans look very cool, being more like stove to sculptures that are activated by heat, are much quieter, and they don’t require an electric supply or batteries!
![]()
The down side to these wood burner fans is that the TEG modules don’t last forever. In fact I would give the cheaper modules a maximum expected life of five years, and that’s assuming they don’t get overheated at any point! The large heat cycling is really tough on them. I am currently working on a way to overcome this problem with a thermostatically responsive base unit. Watch this space for that…
In the mean time, to give an idea of possibilities, here is another one I made:

| Tweet |
January 31st, 2020 at 3:01 am
Hey I just wanted to thank you for posting the wood stove fan from junk videos! They inspired me so much I made one of my own! I used the cylinder from a Honda CT110 and the heat sink from an old Mac G3. Works really well! I could send you a pic if you want to see it. Thanks again! Your creations are amazing! Mike
February 20th, 2020 at 12:54 pm
Hi Michael. I am coming to this a bit late sorry, your nice comment got held up in the spam folder I’m afraid.
Thank you so much for the encouragement, I really appreciate it!
I would love to see your stove fan! Maybe you could upload it to the Flowering Elbow facebook page?
Thanks again,
Bongo.