Plastidip vs Sugru edge guards
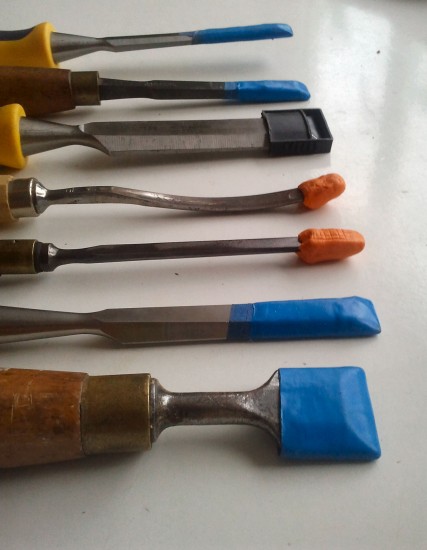
There are a few special travelling chisels that don’t stay safe in their case at the workshop, but are stashed in my ‘tool box’ (which is actually an 18v drill case) and come with me everywhere I go. Tired of them banging about against other tools and acquiring small dinks in their finely honed cutting edges, I decided to make some tip protectors for them.
There is an established method using plastidip (see this Popular Woodworking 2011 article by Christopher Schwarz) and we also thought we would give sugru a try to see how theycompare.
The Plastidip vs Sugru test
Lets start with plastidip. I basically followed Schwarz’s method of wrapping the end with masking tape (sticky side up – away from the chisel, so that it can be slid off) and dipping the tip in plastidip. To get what I thought was sufficient coverage required 3 slow dips, with 30 minutes of dry time between each (it was a warm day). Some of the chisels worked better than others. As the plastidip dries it shrinks, which means that on most profiles the covers fit nice and tight when finished. But I did find it slipped too easily off one particular chisel.
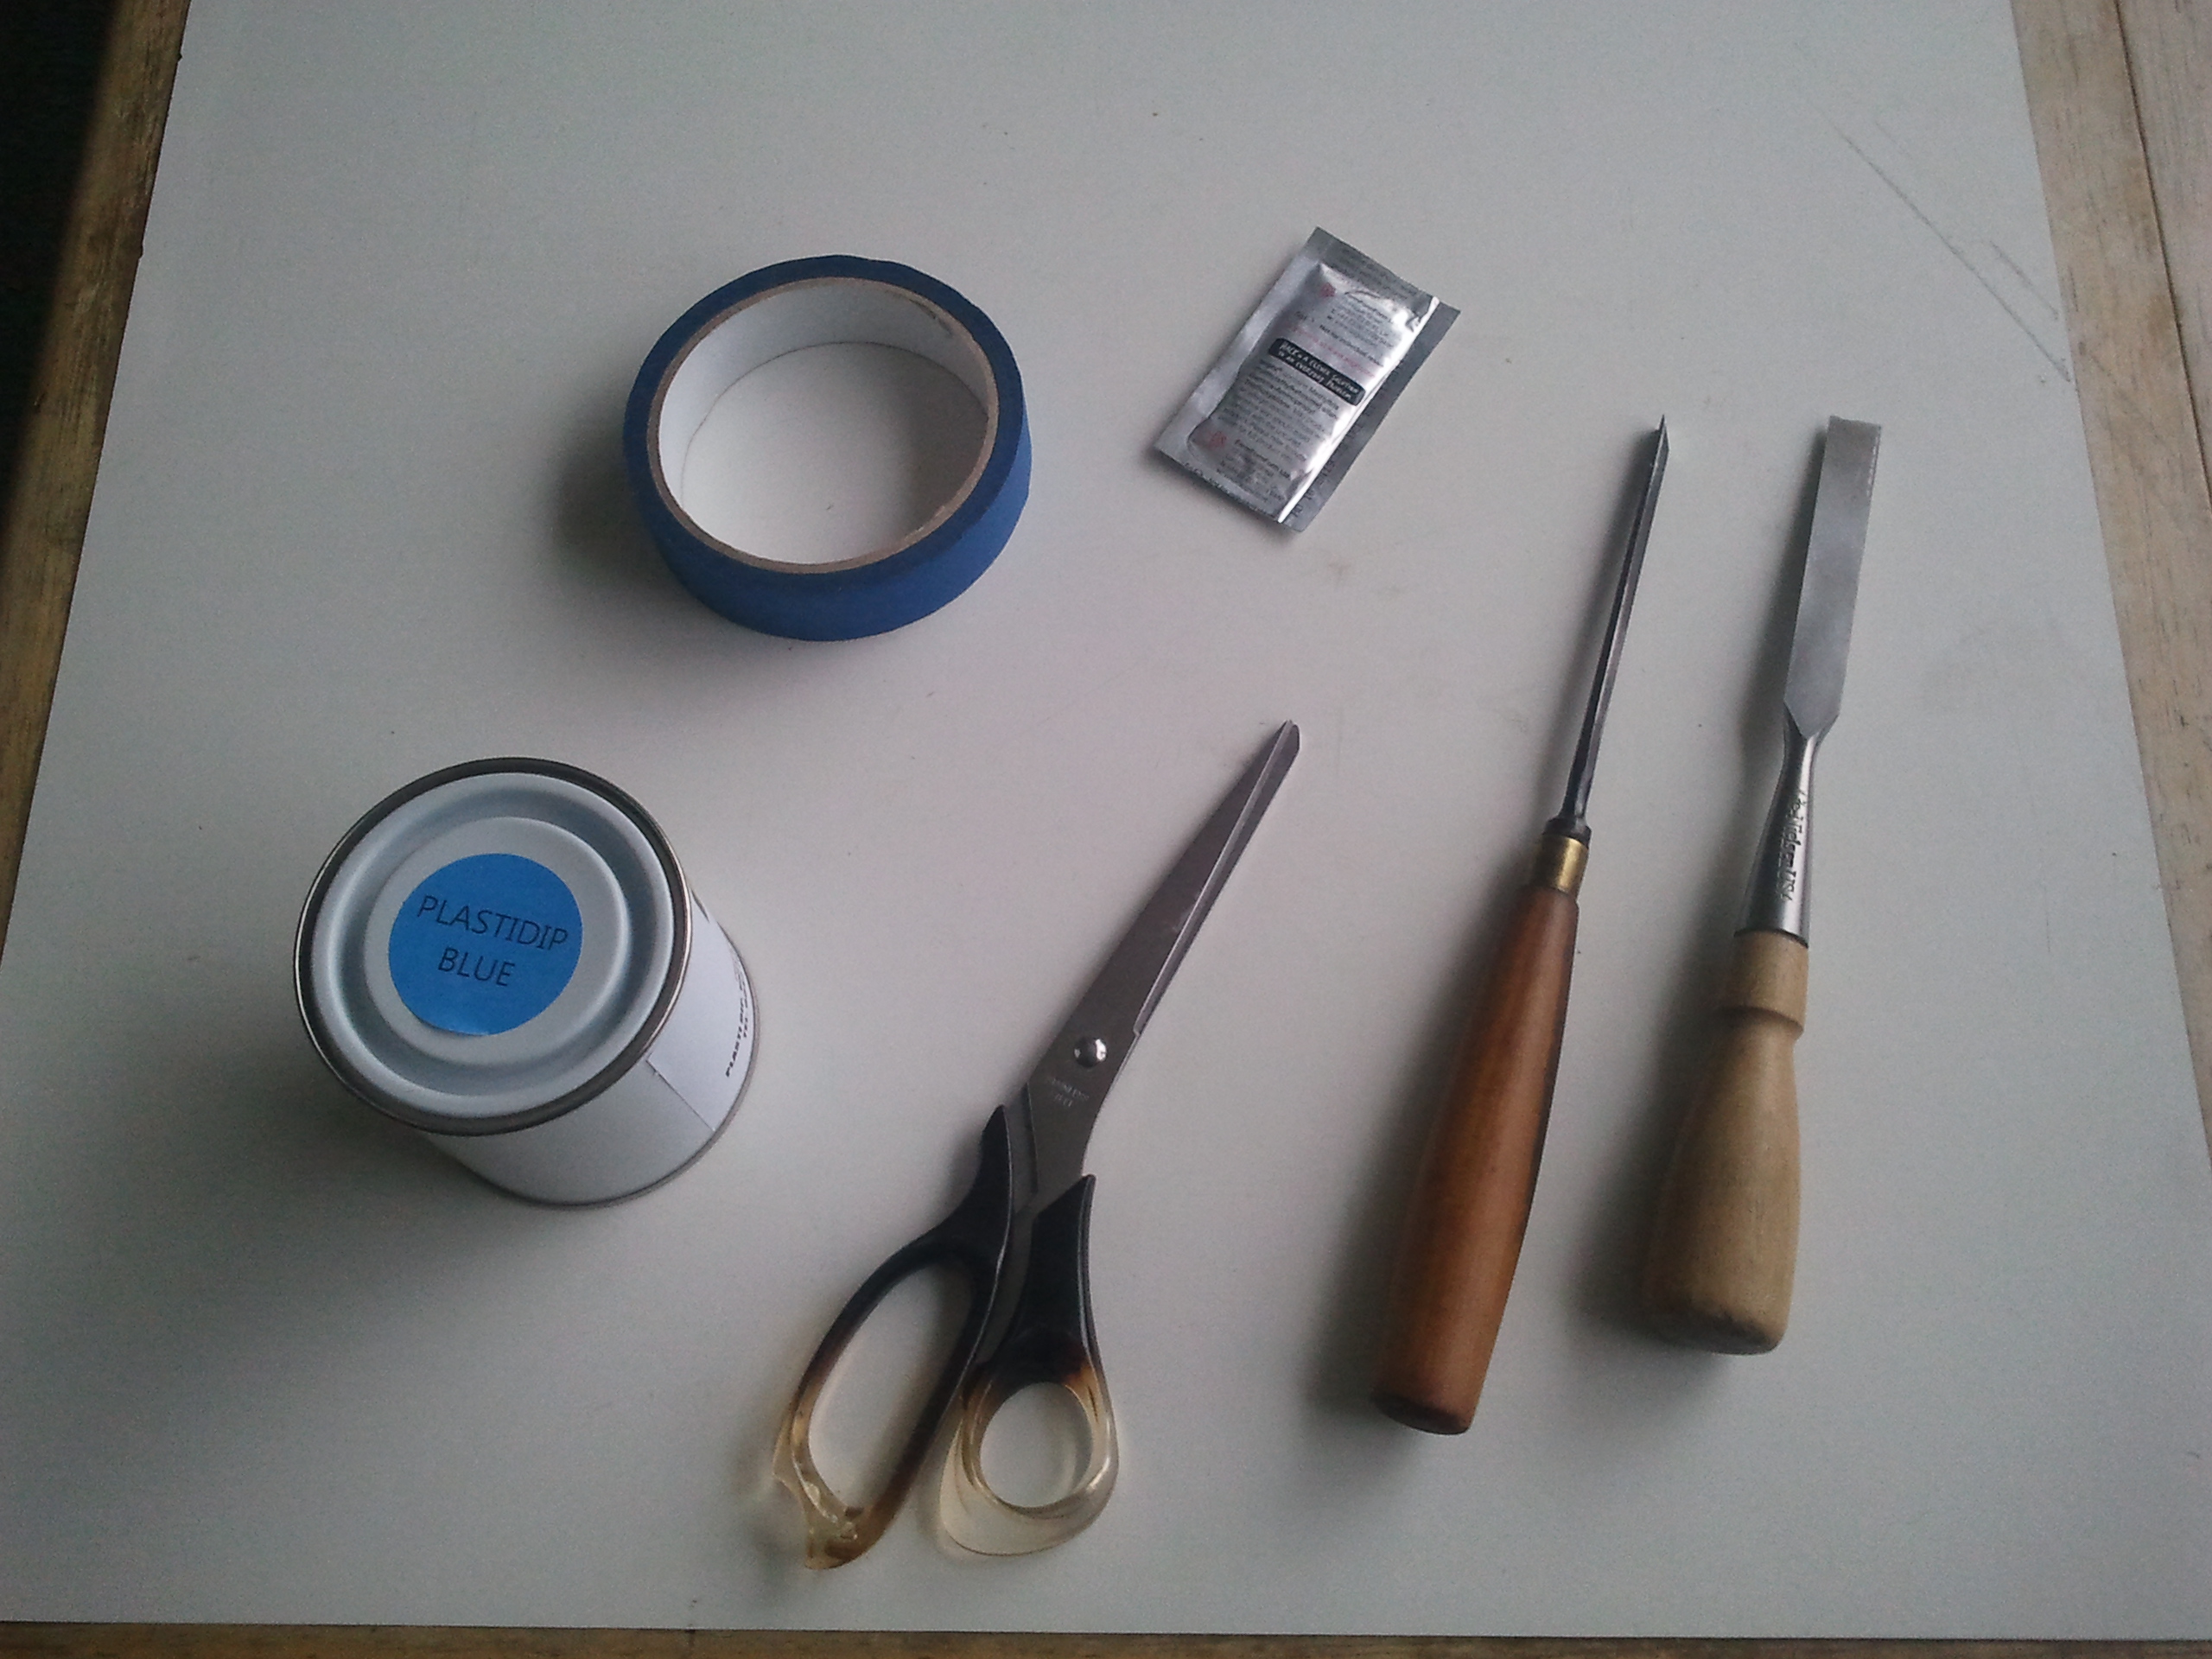
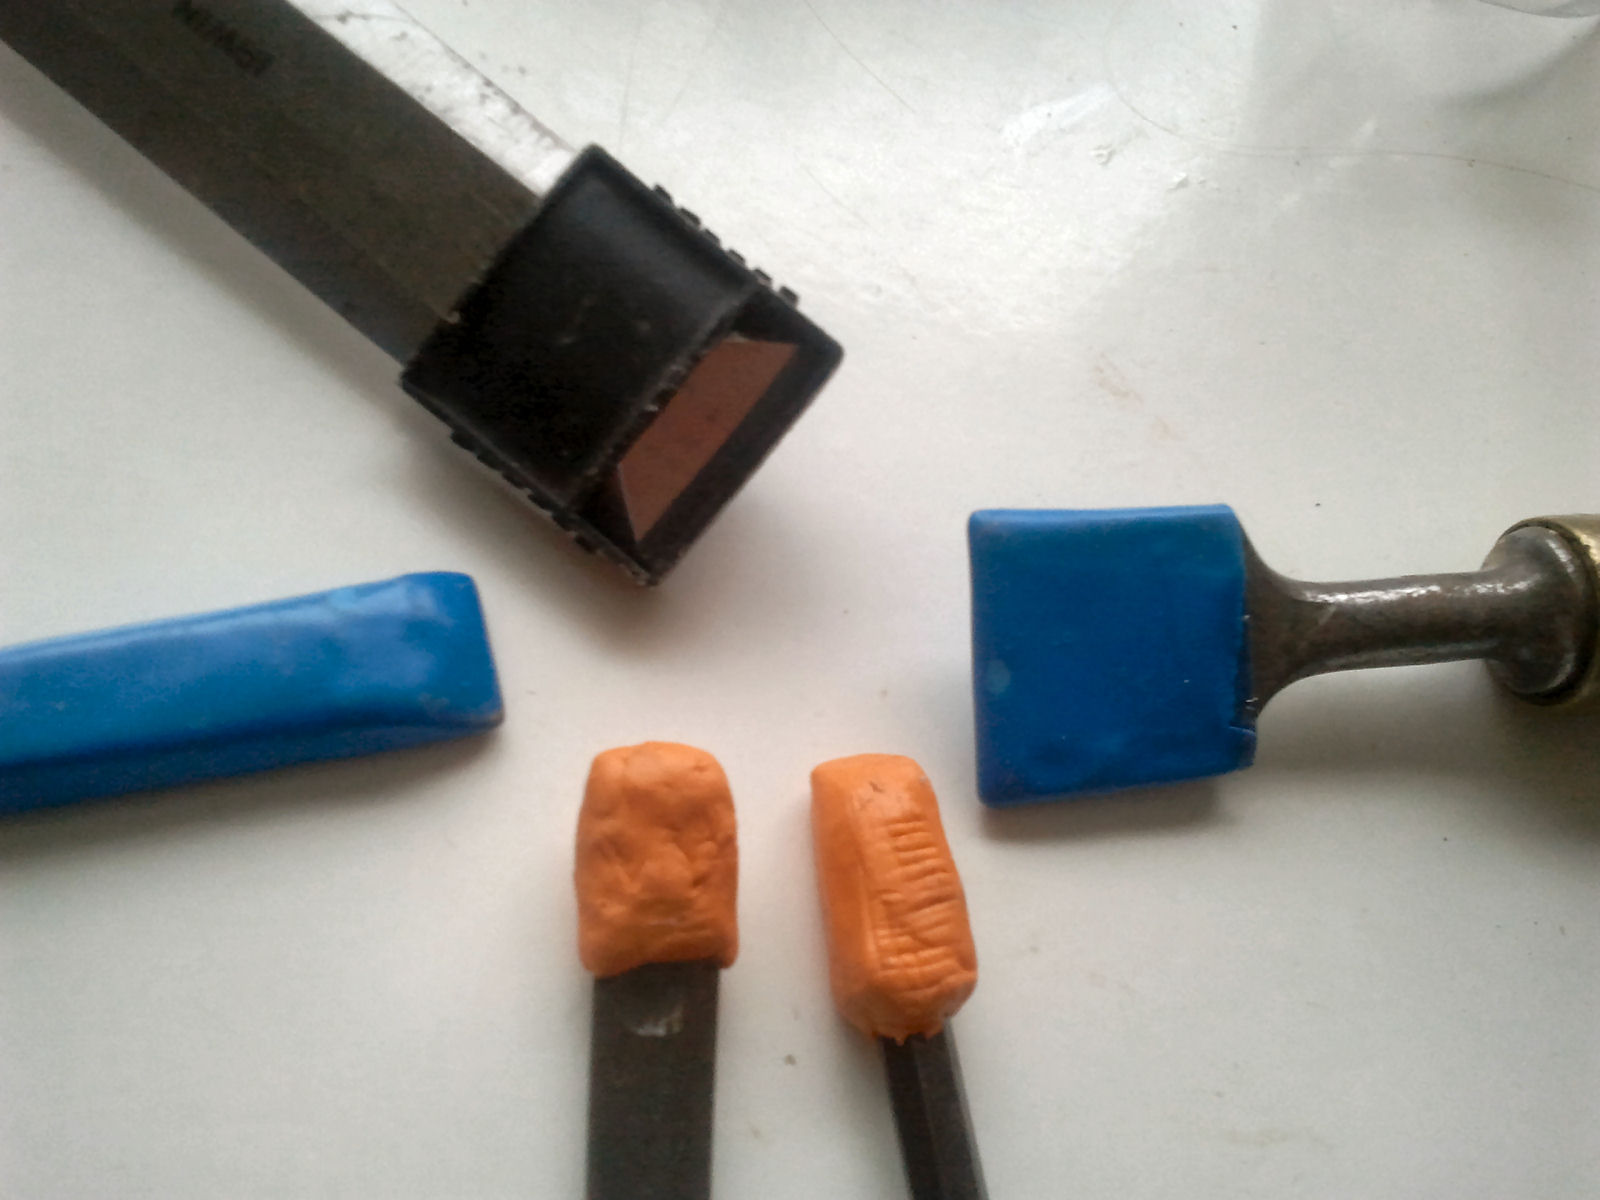
Tools used – Blue masking tape, Plastidip, Sugru, scissors.
One not so desirable effect of the shrinking is that it tended to lift the edge of the masking tape making an unsightly bumpy bit. I’m not sure how to prevent that in a full-proof way (?) – it happened on some but not others…
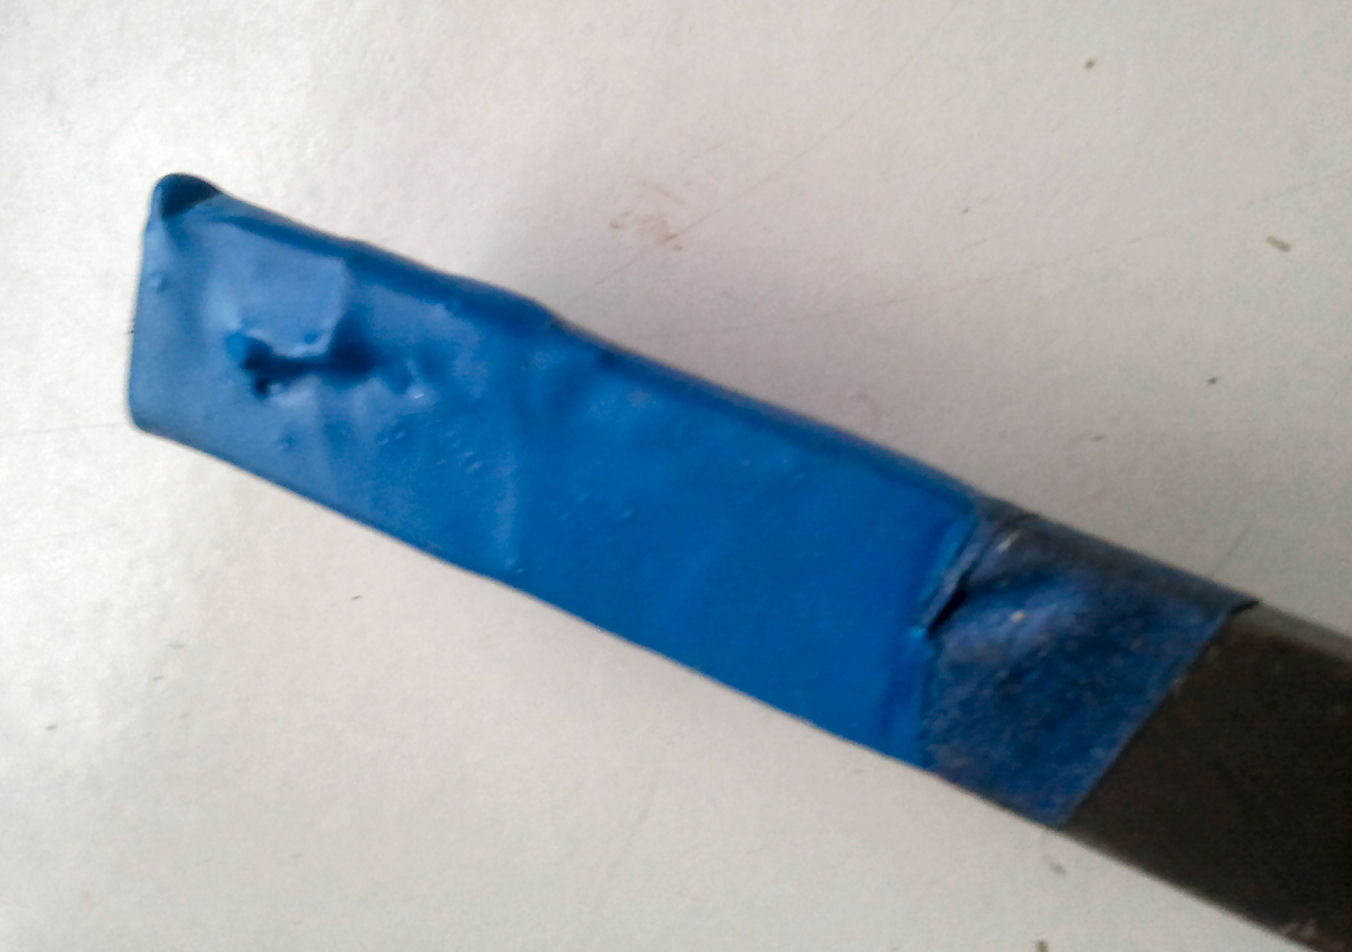
Plastidipped chisel. Shrinking during drying of the first coat has pulled a corner of the masking tape up and made an unsightly bumpy bit.
Apart from that quirk, I quite like the way the plastidip ones tuned out. The shape of the chisel’s tip underneath shows through, but then so do the ridges of the making tape unless you do loads of dips… The dipping itself is easy enough, just slowly dip it in and out of the tin at a rate of about 1″ every 5 seconds. So while that bit’s quick, the process seems quite time consuming, because you have to do at least a few coats and allow dry time. It is also good to do it outside because of the nasty fumes…
Fumes mean outside dippage
Plastidip summary:
Work time: 5 mins prep, 5 mins dip. Total time: (including faff and drying between dips): 4 hours
Cost: ~ £15 for small tin of plastidip, but one tin will do all your (and your friend’s chisels) and can be used for many other projects.
Downsides of plastidip method:
- You have to buy more than you need
- It smells
- Masking tape can peel and go lumpy during drying
- Needs a few coats
Upsides of plastidip method:
- Does the job
- Comes in lots of colours
- Shrinks nicely onto chisel, so grips ok with most profiles
- You can do all you chisels and other sharp edge protectors in one batch
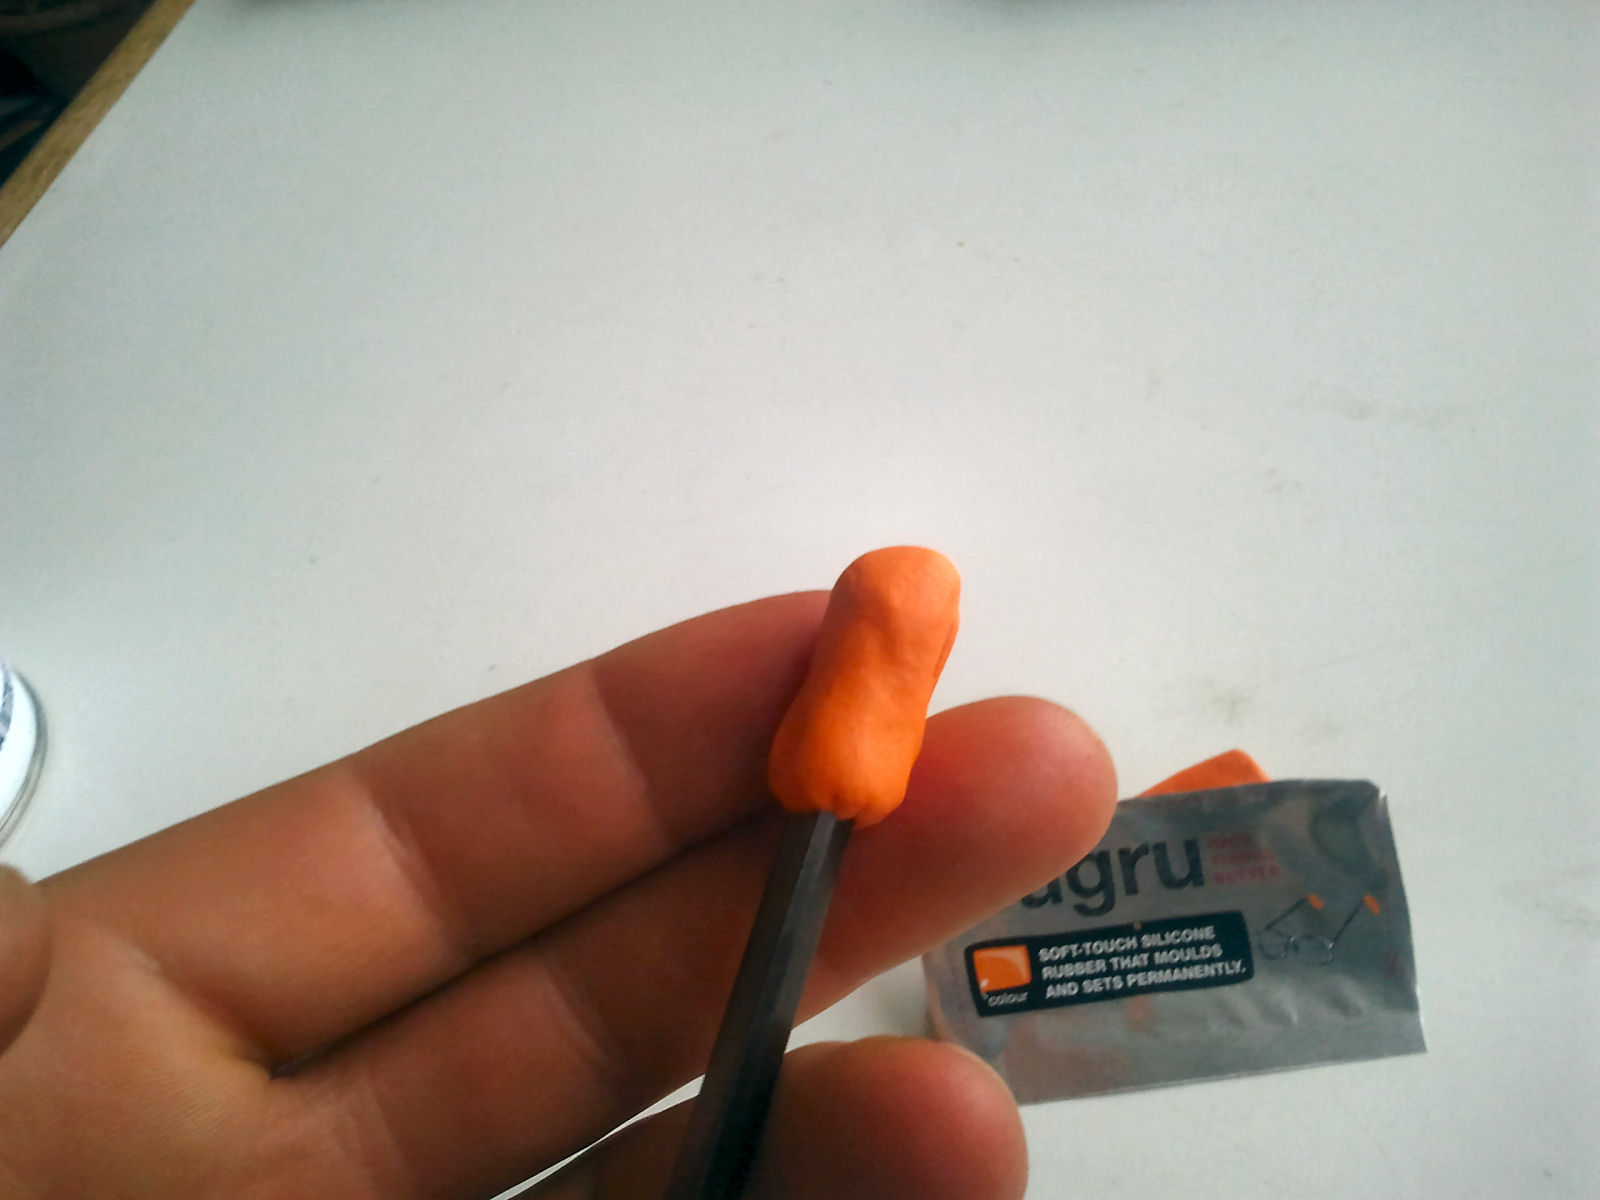
Sugru Tip Protectors Method
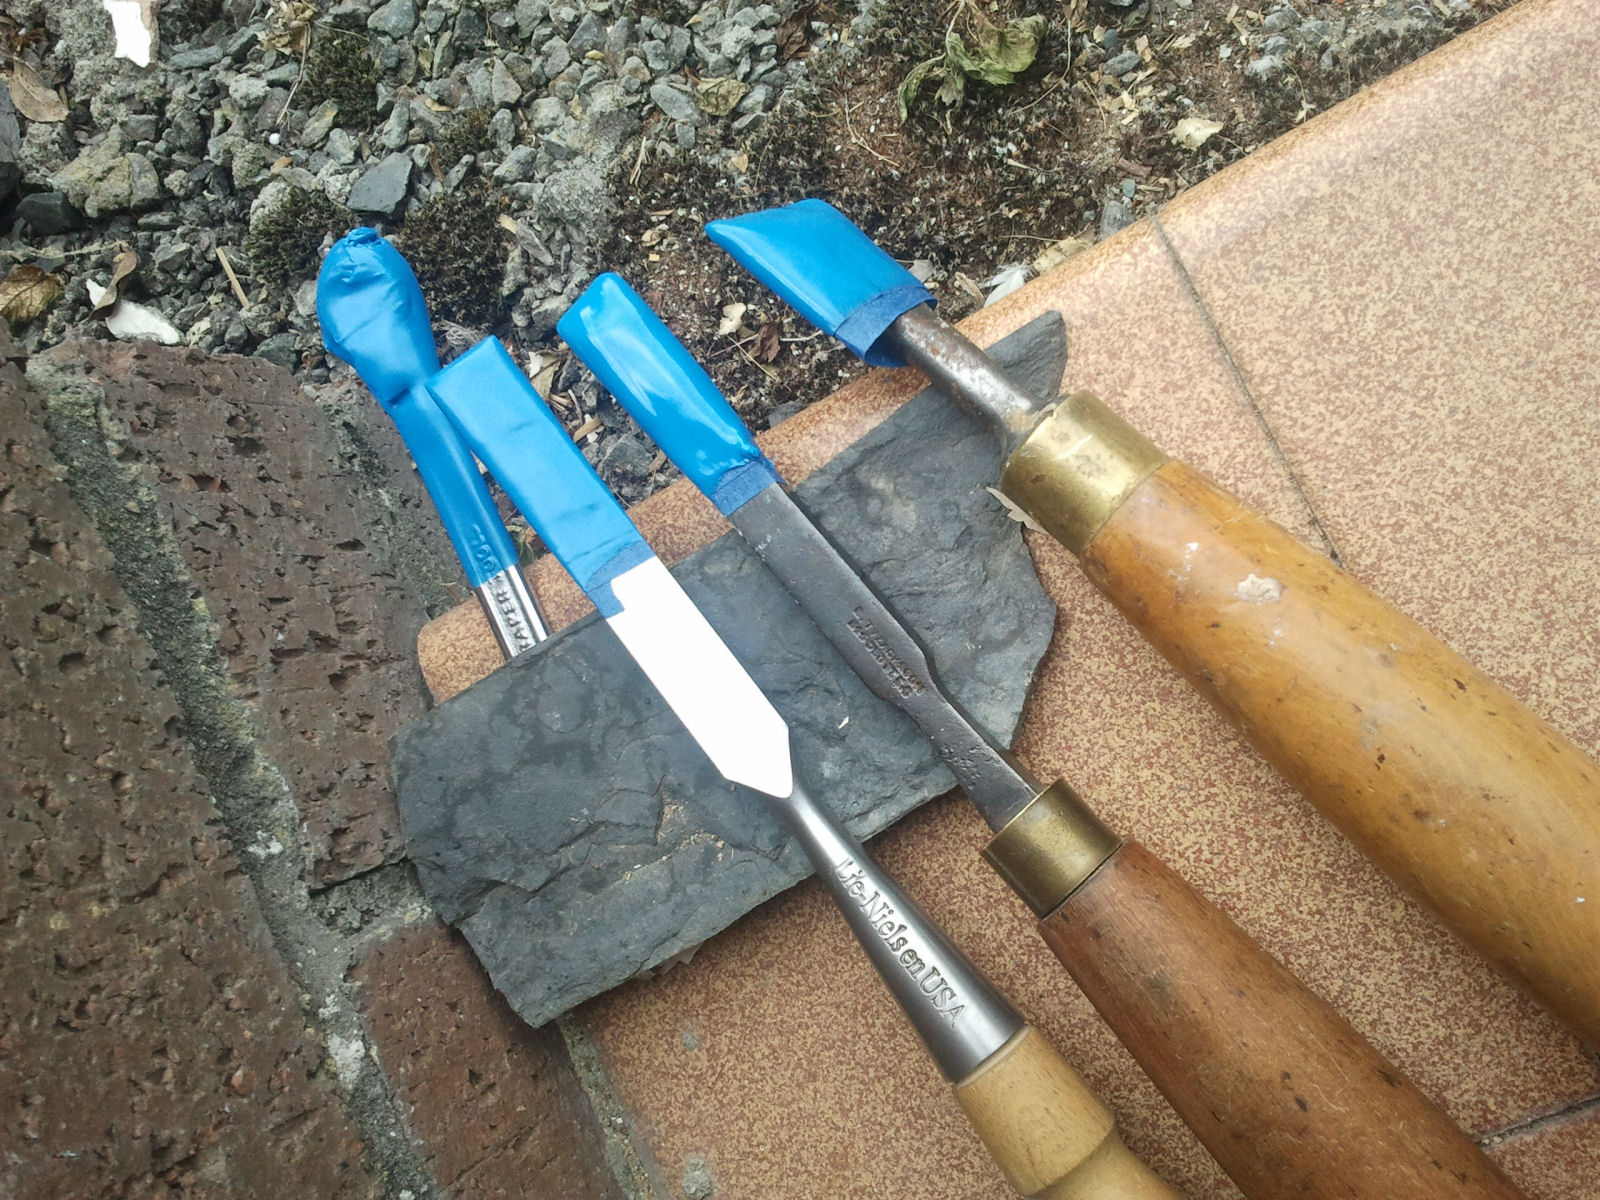
For the sugru tips all that is necessary is to open the sachet divide the sugru in into the size required (one 5g packet did two small chisels – one whole sachet per average chisel would be ok) and mold it on with your fingers. My chisels had a sheen of oil which helped slide off the sugru. I didn’t let the sugru set in place on the tip but slid it off the tip as soon as I thought it was fitting alright, and left it off the chisel to cure overnight.
We only had one packet left so could only do two small tips – a chisel and a curved gouge. For the curved gouge I think the sugru would have excelled over the ‘plastidip-masking tape’ method, and it would be very difficult to follow the curved profile of the gouge with the tape – not a problem for sugru.
The final sugru tip is ready to use after 24 hours, which is longer but feels like less, because once you have done the shaping you can forget about it. You can do it inside without fumes too.
In comparison to the plastidip, the tips are not as sleek, and are a direct result of how much care you put into hand crafting them. In retrospect I would definitely have used a release agent (apparently washing up liquid diluted with up to 10 parts water makes a good release agent for sugru) and let the sugru cure in place on the chisel. This would be superior to the way I did it, which tended to deform the still malleable material as I slid it off.
In a parallel world I would create a longer, more complete protector, less likely to come off by accident and covering more of the tool. That would obviously use much more sugru, which brings us to the main sugru stumbling block: its cost. Here in the UK, for approx £13 you can get 8 little sachets of sugru. That would do about 8 chisels, depending on size. But only just and no more. To have a really nicely protected set you would double up and 8 sachets would do about 4 chisels!
Sugru summary:
Work time: 5 – 10 mins of hand crafting
Total time: 24 hours for sugru to set.
Downsides of sugru method:
- It costs quite a bit
- Finish looks a little less ‘sleek’ than plastidip ones that work perfectly (though that’s obviously personal preference)
Upsides of sugru method:
- Does the job
- Ability to handcraft a personalised protector
- Using release agent they can tightly form over more complex compound curves like those of a gouge.
- Can be used inside
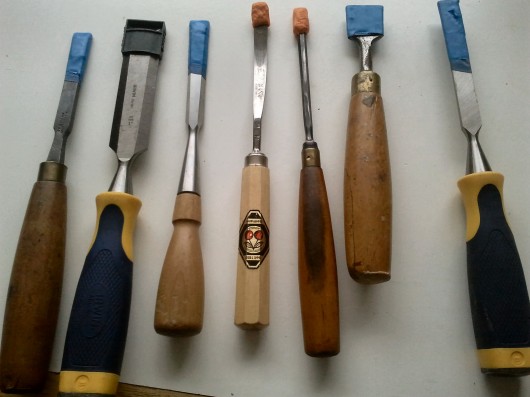
Plastidip & Sugru tip protectors comparison
There was room for improving the way I used the sugru, but as it stands, neither method is functionally quite as good as the plastic protectors that came with the Irwin chisel set I got years ago – those are tough, don’t come off by accident, and leave a gap near the tip – this both lets trapped moisture escape, and allows you to see at a glance and assess the state of the edge. That said, I don’t actually have many of those left, as they are black and small and get lost. They’re also no good for the other odd shaped and sized chisels I use. Both methods work well for these!
Personally I like the look and feel of the sugru ones better, and can see how they could be improved further with the modified method outlined above. I also recon the sugru is easier and more pleasant to work with than the plastidip, but neither product is necessarily great environmentally. Still, on balance, it seems a worthwhile little project if they stop you cutting yourself when rummaging in the toolbox, or save lots of re-sharpening time by preventing dinks in the tip. Sugru has been marketed heavily towards the hack ‘n mod and repair culture, and so has arguably done quite a good job of raising awareness of the importance of mending in general – so that’s bonus points over plastidip in our view. If we had lots of sugru we would definitely use it in preference to plastidip. If you have lots of chisels to do, the benefit of plastidip is its lower cost.
| Tweet |
September 29th, 2014 at 7:07 pm
Great test and results. I’m a big fan of Sugru but the cost does mean that’s it’s not the first option I choose for things. Check the Sugru site for tricks on getting a better surface finish
April 2nd, 2015 at 4:16 pm
Very thorough article! I laughed to myself because I have been using wine bottle corks for years on everything smaller than 3/4″. I like the cork because it is so easy to replace when lost and the round shape makes them easy to carry in my pocket. I use them for my carving knives as well…