The Stove’s air-to-air Heat Exchanger
We have been testing the experimental wood stove and heating the workshop for a while now, but for the sake of completeness and order lets have a look at the heat exchanger build.
Just as a recap on the design: The heat exchanger is a completely separate unit to the burn chamber. That way the burn chamber can be massively insulated – giving a very hot efficient burn. Once that burn is effectively complete we need to get the heat out of the waste gasses and into the room. This is where most wood stoves fall down… Many stove manufacturers are bit misleading and specify very high efficiency figures – but these often relate to combustion only (mass to heat), rather than the heat that gets put out into the room. Lots of the heat usually goes up and out the chimney! Just as an example a 90% efficient wood burner with a poor heat exchanger, lets say 10% efficient, leaves us with a total efficiency of just 9%. Now lets say we have an averagely efficient burn chamber say 80% (even comparitivley cool smouldering fires turn more than 65% of the wood used into heat), but with a better heat exchanger, say 30% efficient, that gives us a total efficiency of 24%. A massive increase in total efficiency.
So yeah, the design of air-to-air heat exchangers is fairly simple: maximise the surface area available for heat transfer, while not adding too much air resistance (which would reduce the ‘draw’). Using scrap canisters we are opting for the ‘barrel inside barrel’ style, where the flue gasses travel between the two…
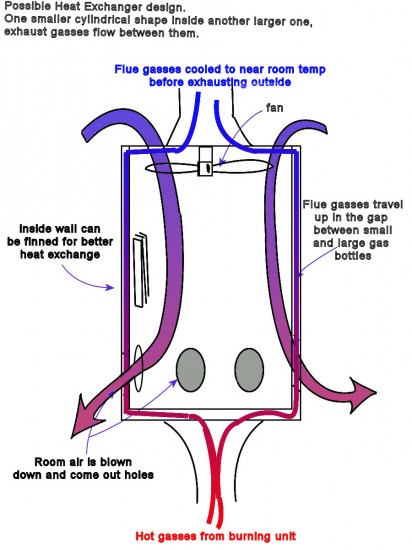
So while we stuck to that general design, during fabrication I went off the idea of having the fan blowing room air inside the assembly. Short of welding it in there, which would leave all kinds of maintenance problems, I couldn’t figure out how it would work…
Fabricating the Heat Exchanger
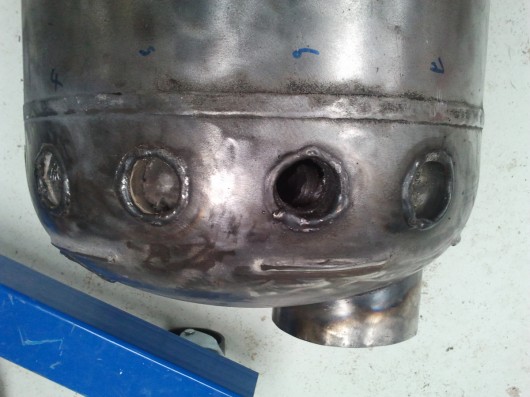
Below are the two cylindrical canisters. The inside one started out the same size as the outside, but we split it vertically with a jigsaw, and used ratchet straps to pull the diameter down, and then welded it back. We calculated the diameter, so that the area between the two canisters would be equal to the cross sectional area of the five inch flue pipe we have. This way the heat exchanger will not introduce too much air resistance, while still passing the flue gasses over a large surface area.
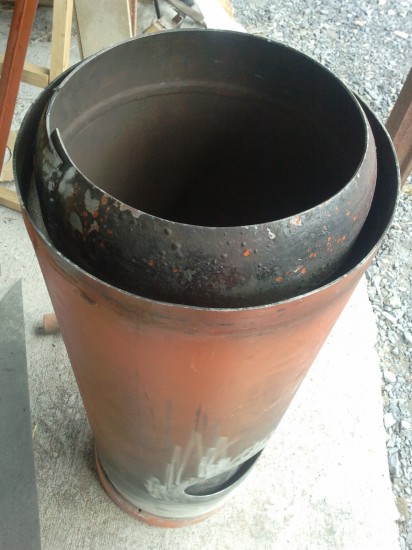
The flue gasses will pass between the cylinders off-loading there lovely heat to the metal, which will radiate it out to the room. The hole you can see in the side will be one of two access hatches that will allow for periodic inspection and cleaning.
So we just need to put lids on, and add a spigot (flue joining bits) to the top and bottom and we would have a functional heat exchanger. But to complicate matters, and to almost double the useful surface area of the exchanger, we want the room air to access the inside face of the inner cylinder…
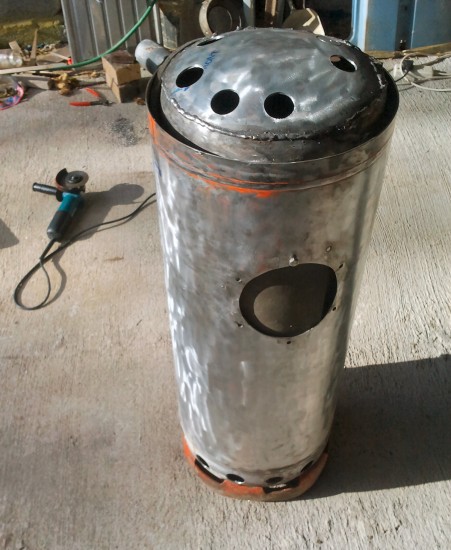
So the holes in the top and bottom will allow air to pass from the inside of the inner chamber, into the room. But, that needs to be sealed from the space between the cylinders (because that’s where the flue gasses go and we don’t want them mixing with the room air)…
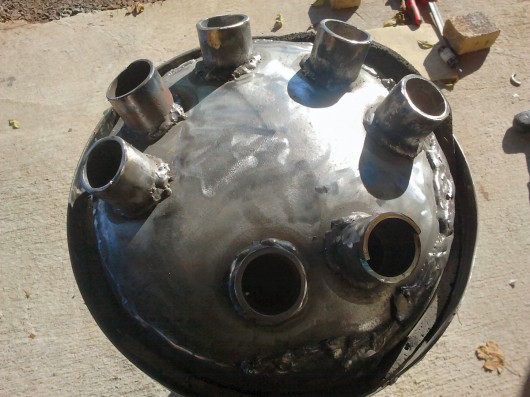
The small bits of scrap pipe here should do the job. A similar operation is done on the bottom of the exchanger as well.
Once the bottom is all done, the lid, complete with its spigot, is carefully aligned and welded on…
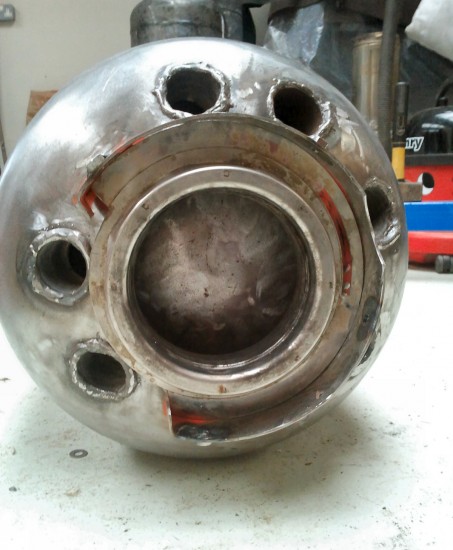
Here’s the bottom, and the spigot to connect the heat exchanger to the burn unit.
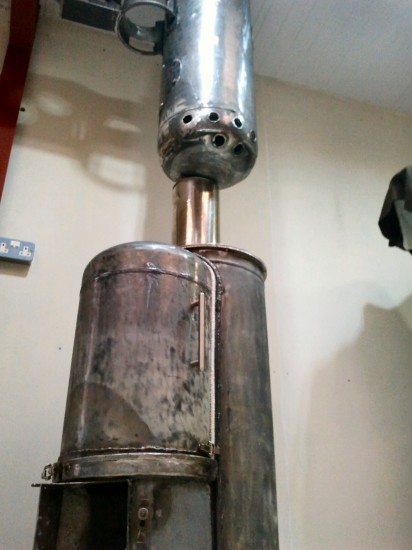
Mounting the Stove’s Heat Exchanger
By this point the heat exchanger becomes quite a beast and we need to rig up some hefty support to hold it in position above the burn unit. We weld up a bracket from some scraps (including a big bit of structural I-beam steel) and use big bolts to fix it to the steel frame of the workshop.
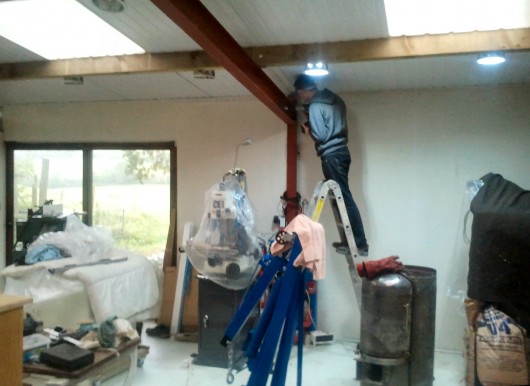
Once the bracket is firmly in place and we have done pull-ups and jumping swinging leaps from it, are satisfied with its solidity, we start positioning the exchanger. The bracket is designed so that a screw can be tightened to adjust the unit up and down, and four nuts lock the exchanger in place.
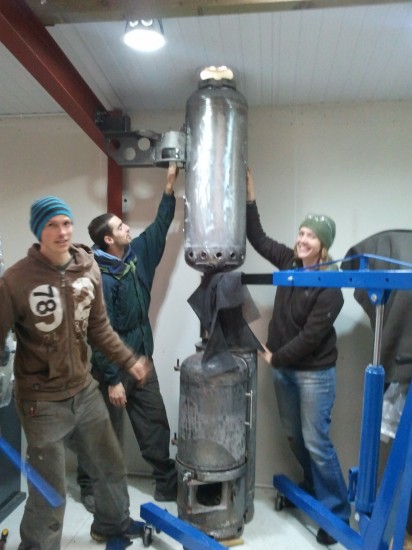
The hydraulic engine-hoist (affectionately named Swanny) is very useful, as are the bodies risking life and limb to keep it steady. With the exchanger raised up, a piece of reclaimed double wall flue pipe is fitted between it and the burn unit. The bolts are all tightened, breath is held, and hiding places sought, as…
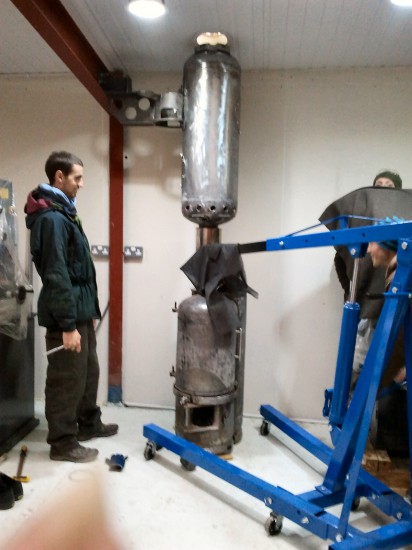
the crane arm is lowered. More info on how it functions and testing to follow…
| Tweet |
April 15th, 2013 at 4:54 pm
Interested in knowing what sort of heat to the room that you get from this unit
April 15th, 2013 at 6:21 pm
Hi Les,
We haven’t calculated it in a particularly scientific way, but according to this stove kw calculator our room size required an output of about 9kW to heat (assuming a well insulated draught free room). With this in mind we know that the room can be brought to 22 degrees C within a couple of hours of lighting (not that we aim for 22C normally – 18C is a much nicer workshop temp). If we keep feeding it lots of fuel it gets hotter than 22C and that’s when outside temp is below zero degrees. So I am guessing output is something like 10 to 15kW…
April 16th, 2013 at 5:56 pm
the idea of an air exchanger implies that cold air from the bottom (floor area) can be used to circulate the room air therefore evening out the temperature from foot to head. Was that the result?
Thanks
November 10th, 2013 at 1:23 pm
Hi there,
Enjoyed the above article but some of the comments about modern stove efficiency are a bit wide of the mark – remember that we also need high exhaust gas temperature.
Regards
Dave
January 30th, 2014 at 8:20 pm
Hi,
I was thinking of simply slipping a larger flue over the existing flue with radiating fins to help the exchange and center the flue. What do you think?
Thanks
January 30th, 2014 at 8:57 pm
Hi Mark. How tightly with the ‘slipped over’ flue fit? The tighter the better.
Not a bad idea – just monitor the temp at the top of the flue – you don’t want to take so much heat that you get creosote build up… Gas exit temp of 150C is what you want to aim for.